Hold the Phone!

11 Jan

HI! I’m here, bursting through the proverbial door of the blogisphere to announce to you that I’m going to be up and running once again. As of this weekend, more pictures, how-tos/how-I-did-it’s, and new projects will be arriving on a more regular basis.

The Christmas season is a VERY slow time of year for me… mostly because I have yet to get into taking cookie orders (wait… what was I thinking?!). Sorry for the LONG pause. Welcome back, and let’s get messy!

ARRRRGH!

26 Sep

My apologies for falling off the grid for a short spell. Truth be told, business has been on the slow side for the last month, which has provided helpful breathing space for other important developments in my life (a la the adoption process currently ensuing… I’m not being adopted… I’m adopting… just making sure that’s clear), but I look forward to more orders in the very near future.  Tonight, however, I bring you a story of a past cake made for the son of some friends of mine. The little tyke was turning one, and the theme of the party was a costume party befitting “Pirates vs. Ninjas”. As I’m sure you can imagine, I fall under the “pirate” category of people, hence the title of this post. Besides, what does a ninja even say? “Heeyah“?

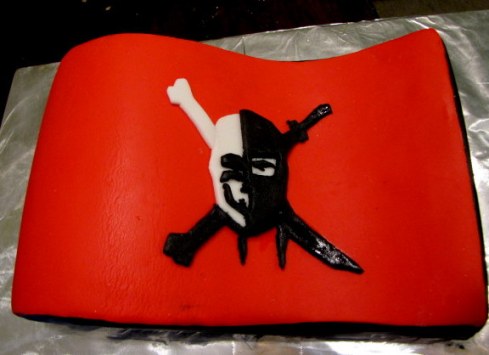
I began my design a little apprehensively. Up until this point, I had been given very little leeway in the construction of cake orders. Every previous order was at least a little specific in terms of the appearance, but my friends only specified the theme. For days I rummaged through the gaping chasm of my imagination, and once at the bottom discovered the most fitting cake for this occasion would be a flag that fit the bill.

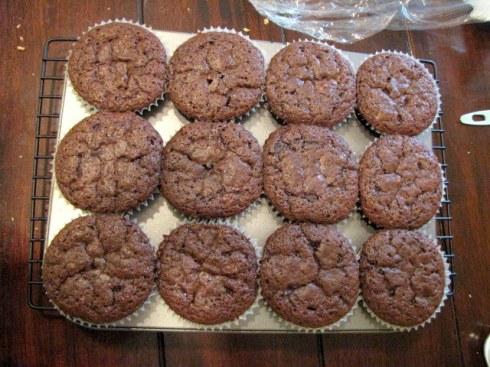
Beginning with a lovely Chocolate Mud Cake and Dark Chocolate Ganache (which I claim quite shamelessly to be my favorite combo),  I set to work. Two batches of the cake would be divided. One would serve as the main event, and the other would take the form of a few cupcakes to throw on the side to make sure there was enough for everyone.

Unfortunately, in all the excitement of the party in which pirates and ninjas faced off all in honor of a one little Taegan, the crowned one year old, I never got any pictures of the dollop of red buttercream that topped these little experiments. An “experiment” because I wanted to see how baking cupcakes from a cake recipe would fair. To my delight, no dryness was detected, nor any ill effect that I could see. As for the icing, it was mere swirl of buttercream at the top, which is something we’ve seen a million times over. For the record, though I like cupcakes, I rarely make them.

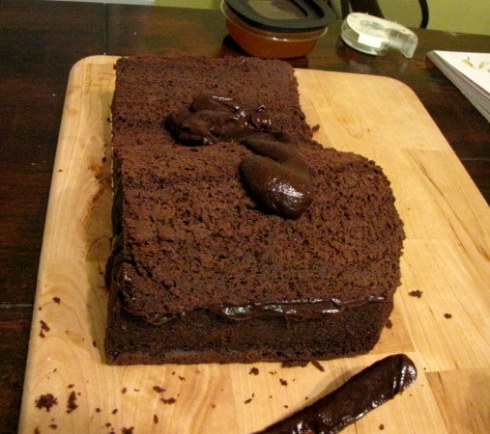
And here it was, the flag now perfectly ganached and hot knifed to look like flag.

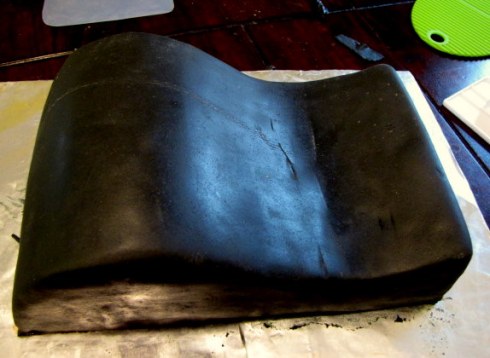
After covering said cake with black fondant, the design was taking shape nicely, and now I was on to my favorite part of any cake making experience- DECORATING.

Now, forgive me for skipping some of the details. Photojournalism was not my subject as you can see, but in my defense, I was juggling more than I had the capacity for. Yes, folks, once again I had agreed to make more than one cake for more than one occasion on the same day. The first was the afternoon party of the aforementioned one year old, the second was my sister-in-law’s party that happened later that evening. The cake for that party, however, never took shape. Literally. It fell over. But that’s another story for another time.

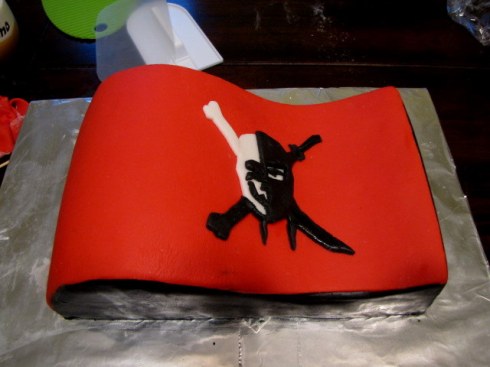
This is simply a better picture of the logo I traced from an image I found on the World Wide Web.  I printed off said image, traced around the picture first with a pencil, and then honed my once-perfect skill of cutting out detailed images due to hours of my childhood spent playing with paper dolls, I created the two-layered template for my flag’s logo. It took a long time. I did the white skull first, and then cut out the black overlay to cover half of it.

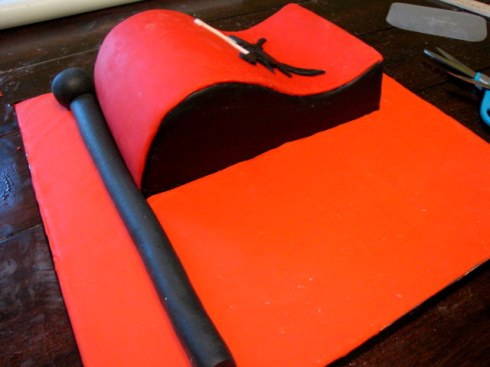
While the hands of the clock seemed to blur as the hours disintegrated  into what felt like minutes, I covered the display board in red fondant (clearly), and created a poll out of a very large rolled chunk of black fondant that I should have flavored with black licorice, because that was exactly what it looked like.

And thar she blows! The cake was delicious, though I had no time to eat any- we were out the door, in and out of the shower, dressed to the nines, and on to our next party before any of that decadent dessert crossed our lips.

How to Fill a Pastry Bag

17 Aug

For me, one of the most obnoxious parts about icing and decorating sugary treats in the past, was the mess I had to deal with when using a pastry bag. Before beginning my promenade into the land of cake decorating, I would battle with squeeze bottles or tools of similar make whose function was to give the dilettante decorator professional results with little effort. Of course, gimmicky things like that never quite live up to their claims, but pastry bags were every bit as messy for me, so I often reached for the tools of an amateur and left those scary pastry bags to people who knew what they were doing.

By now, I’m sure you’ve guessed that I’m about to give you another tutorial, this time on how to correctly (according to me, at least) fill a pastry bag without losing your sanity in the process.

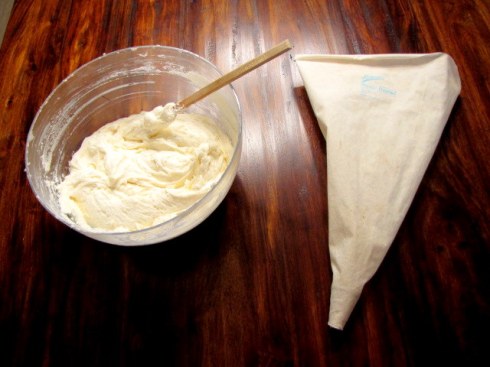
We start with the necessary tools: icing of choice (this is my favorite cream cheese icing recipe you see before you), a pastry bag, and a decorating tip.

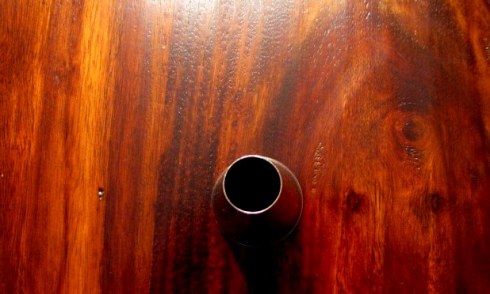
The tip I used was a plain circular tip because I needed it for filling a cake. I know, I know… I did a post on how to fill a cake before posting how to fill a pastry bag. My bad. Anyway, the tip you use is up to you and what you plan to do with your icing once you have it ready to go.

A word on couplers: most of the time, you will see professional cake decorators attaching a coupler onto their pastry bag before filling it with icing. It’s a two-piece plastic attachment. One part of it goes inside the bag, while the other part screws the tip, the couple, and the bag itself together. I sometimes use them if I am decorating a cake with something other than fondant, but when I’m filling a cake (as I was in this particular case), I don’t bother with a coupler. I just find that I never need it for filling.

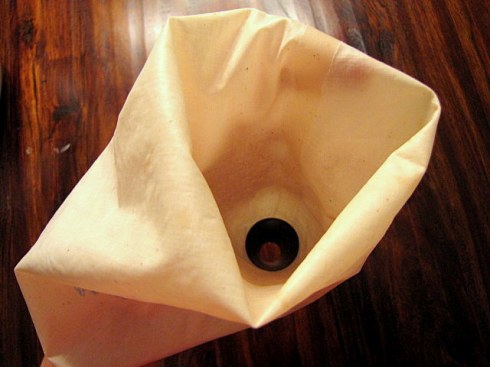
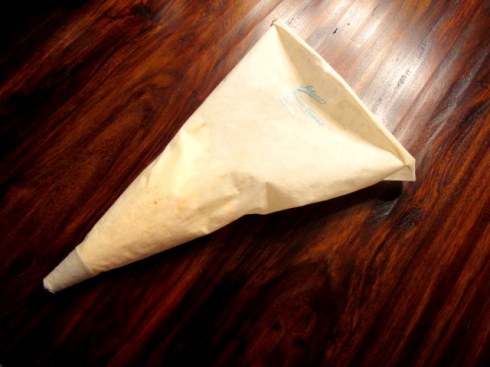
Drop your tip inside your pastry bag… narrow side pointing down. I probably don’t need to say that, but you never know.

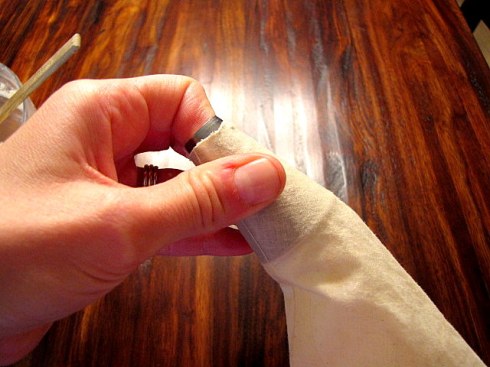
Pull your tip firmly at the bottom of the opening of your pastry bag. The one I’m using here is a personal favorite. It’s Ateco’s plastic lined reusable bag. Once you’re done with it, you just turn it inside out, wash it out real good, and let it air dry. There are plenty of disposable pastry bags out as well, and I have to say, they are extremely convenient. I use them from time to time, but only when absolutely necessary. I have a hard time throwing away that much barely-used plastic when I could be using a significantly more durable reusable product.

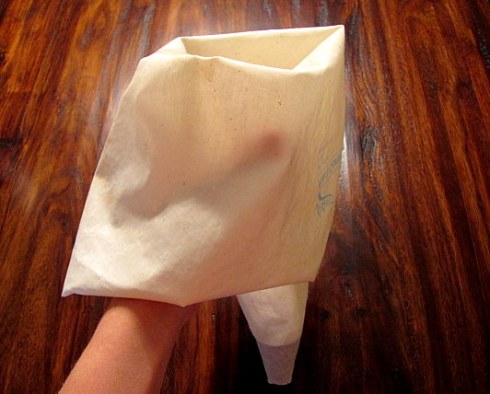
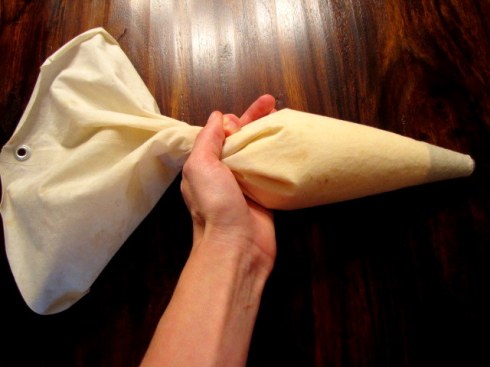
Now, here’s the trick to avoiding a mess: Fold the bag back in half over your hand like you see in the above picture. This protects you from getting icing all over you as well as your work surface. It’s a simple trick, but it makes a world of difference.

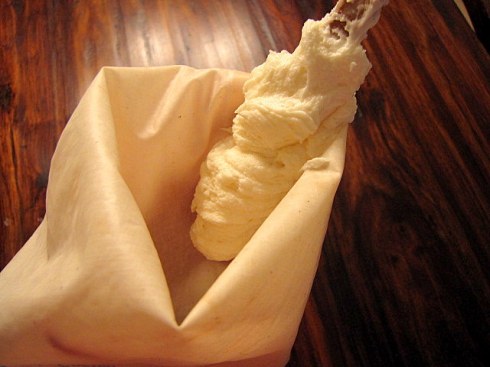
Next, while holding your hand in place underneath the covering of your folded bag, take a spatula full of icing, or filling, or whatever you’re using, and stuff it as close to the tip as possible. As you pull your spatula upward, sweep the spatula along your thumb (the one that’s hiding underneath the folded bag). Continue to do this until you have the desired amount of icing in your pastry bag.

A word of caution: don’t overfill your bag. You need a few inches at the top of your bag for the next step.  As you can kind of see here, I only filled my bag about half full. You can always refill as often as you need while you’re working.

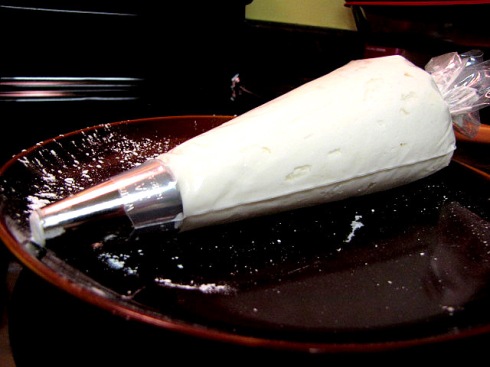
Finally, twist the top of your bag. You see why you want to avoid over-filling? If I would have filled this thing to the brim and not twisted it, I’d have only a little icing coming out the tip, and a whole lot plopping out the top! Not a pleasant thought when doing delicate details on a nice cake. As you begin filling or decorating with your icing, you want to have one hand adding pressure right below the twisted part of the bag (which is exactly what I have pictured above). The goal is to move the icing down toward the cake, not up toward you! While you apply pressure to the bag, place the index finger of your other hand on the side of your tip. This will help you guide your movements in order to be more precise.

*Sigh* See, isn’t that wonderful? No mess.   So folks, I hope this helps.

First Molded Cake

10 Aug

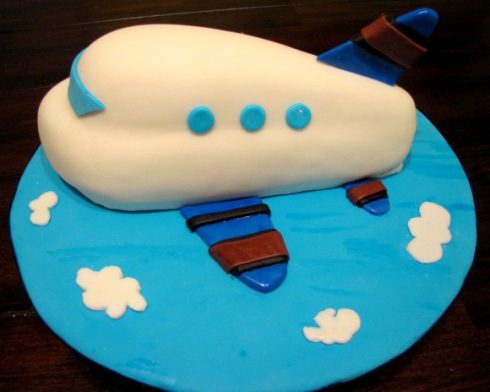
In the first 3 months of my adventures in cake making, my aim was to practice as many times as possible in stretching my artistic abilities, my knowledge of baking, and my competence in combining these realities into a what I hoped would be a sensation. The second order I ever filled was just this sort of opportunity. A molded cake, or I should say sculpted cake was on the docket for the week. Molded hints that there was some special pan involved, which was not the case this time. I wanted to learn how to do a 3D structure without the help of many special tools, and this was just such an opportunity

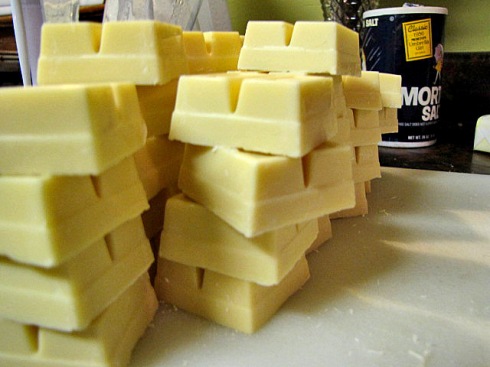
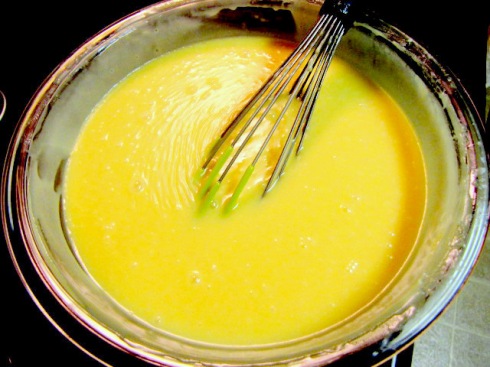
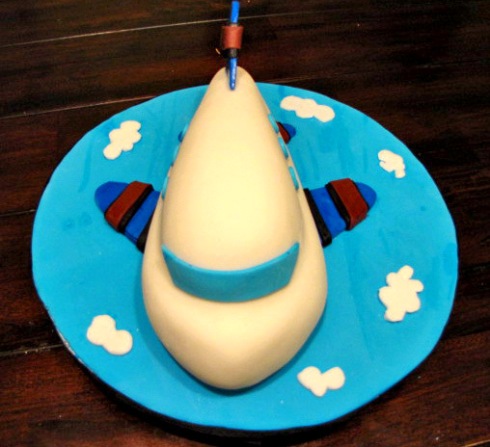
The project: to construct a yellow vanilla bean cake, filled with fresh raspberry filling, and topped with white chocolate ganache and fondant into the shape of a 3D airplane. I chose to work with Baker’s White Chocolate blocks since I wasn’t sure what kind of outcome to expect with imitation white morsels. Let me tell ya, chopping chocolate blocks like these takes a LONG time, but 4 blisters later, I was done and melting it all down into a thick, creamy, rich icing.

Here was my very first bowl of white chocolate ganache. It’s extremely sweet, so learned from this order to warn people to have a strong cup of coffee nearby when slicing into it.

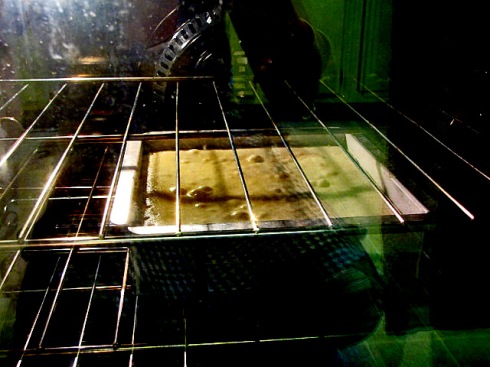
Utilizing my then new Magic Line 8″ square pan, I baked up a delicious Yellow Vanilla Bean cake.  I’m not a big vanilla person myself, but after searching high and low for a recipe I liked, this one has been my staple.

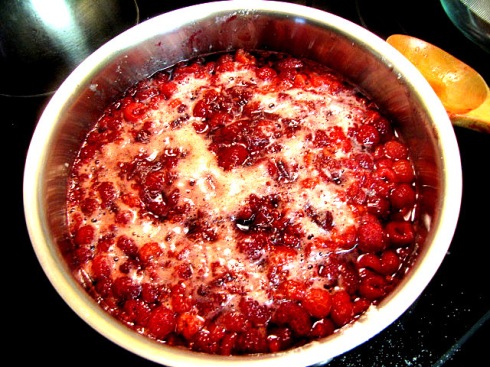
Maybe I’ll try store-bought fillings in the future and tell you what I like and don’t like, but so far I can’t bring myself to do it. There’s just something so delightful about making my own filling.

At this point, I had to make a decision. Since I knew I needed to put a dam of icing around the outer edge of each layer of this cake, I had to choose whether or not I would simply put ganache into a pastry bag, or to make buttercream and use that to dam in my filling. Once I saw that the texture of the white chocolate ganache was slightly unpredictable in how well it would set up, I made buttercream. This was the only time. As I have articulated in the past, I loathe American buttercream, and slightly cringed when I had to make some to make this cake stand firm.

After getting over my dismay, it was time to begin the carving.

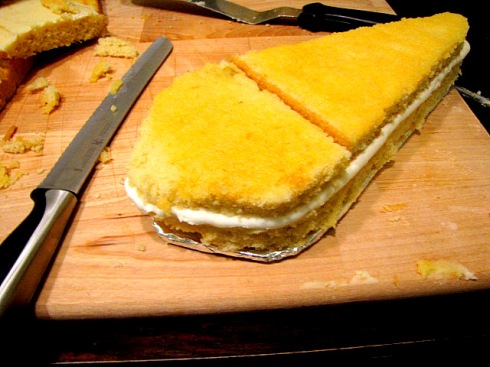
Using the templates in the back of my trusty Planet Cake book, I formed the layers into the beginnings of the airplane. I had made my setup board in the same shape to keep the structure firm, piped the border of each layer with the buttercream, and then smoothed my rich raspberry filling in between those layers.

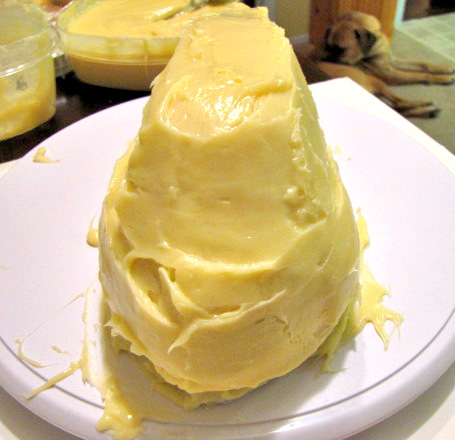
After taking smaller pieces of the cake and attaching them to form the larger part of the cake, I was finally able to ganache the whole beast. To my surprise, I discovered that white chocolate, though a little less predictable in terms of texture, is far easier to smooth onto a cake than dark chocolate ganache. What I thought was going to be a massive challenge, actually fell into place quite easily.

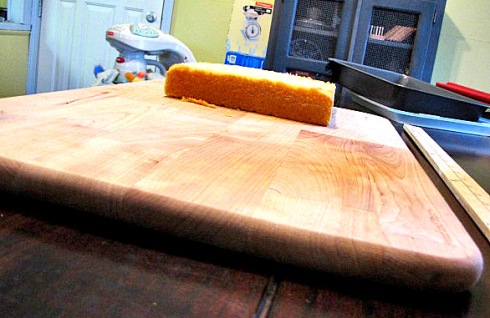
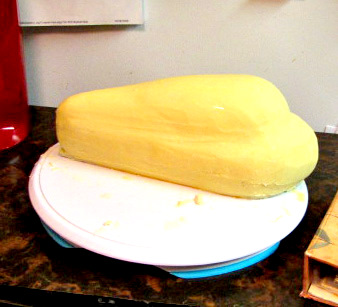
After short bursts in the freezer and some patient hot-knifing, my form was ready for fondant.

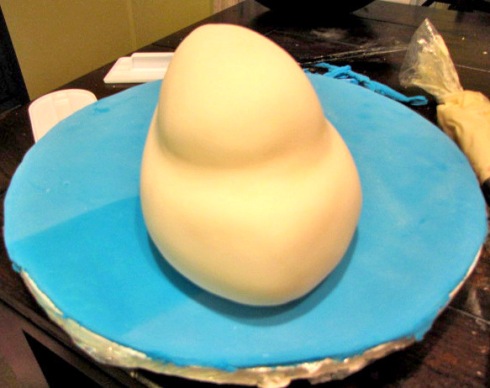
Unfortunately, I had miscalculated on the amount of fondant I needed to make, so the love of my life ran out and got me what I needed for a quick batch of marshmallow fondant, which I used to cover the display board.

Miscalculating the weight of the cake was also a big mistake, and after diverting a minor disaster by catching it before it fell to the ground, I decided to leave it on a flat surface as much as possible.

Thanks to my assistant for the day, Mahan, I was able to get the details slapped on the delicious creation.

This was the final result. Not too shabby for my second cake order ever. More stories to come.

What’s the Big Diff?: The Science of Flour

2 Aug

A lot of people ask me about what kind of flour I use, and it got me thinking one day about whether or not it mattered. Early on when I was first gathering a collective of recipes, I came across as many recipes that called for the average all-purpose flour as I found called for special kinds of flour.

Now, forgive me, because this information is strictly jacked from a number of sites that I can’t remember, but the whole purpose in this little study is to eliminate some of the mystery behind the answer to “what should I use?” so you can get on with baking, not having to ask “but WHY?!”. Maybe you don’t ask that question, but I do all the time, so I feel better when I can share my findings. I’m not a chemist (nor will I ever be, except for the rare occasions when the kitchen requires it), but this is what I have learned from reading and experimenting:

First, when determining what kind of flour to use, you have to ask yourself what kind of cake you like best. This varies so greatly between bakers and tasters alike, that it would be useless for me to try to persuade you from your preferences. Are you the sort of cake lover who prefers to sink your teeth into a hearty, rich, dense cake, giving your tummy a sense of weighty satisfaction? Or, in contrast, do you prefer to eat your cake solely with the use of your tongue, allowing the forkfuls to simply melt in your mouth, leaving your tummy largely unscathed from bite?

I lean towards the former, but it depends on the type of cake I’m making. I prefer to match flavor and texture accordingly, rather than having to choose one or the other. For instance, I like my carrot cake rich and filling, but when it comes to vanilla, I enjoy something a little on the lighter side.

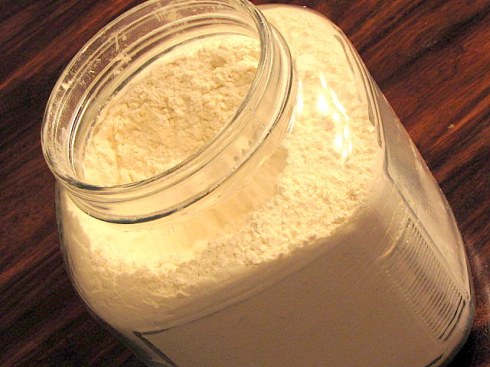
So how do we achieve this? Well, I have in no way mastered the art, but what I do know is a bit about the science of flour. If you were to line up All-Purpose Flour, Cake Flour, Self-Rising Flour, and Bread Flour, you wouldn’t be able to tell by looking at them, but they are all very different. The key? Protein. Each kind of flour has a percentage of protein unique to its category. The greater the percentage of protein, the denser the result of your mixture.

Cake Flour has the smallest percentage of protein, and therefore is the favorite amongst many bakers because of its light result. Self-Rising and Bread Flour have the greatest level of protein, and therefore are well-suited for their intended usage; bread. All-Purpose Flour falls somewhere in between.  This is why when you just grab any old flour off the shelf and throw it in what you’re making, you can’t always predict the outcome if you haven’t previously used that type of flour.

What do I use? Most often, I reach for the unbleached All-Purpose. It’s a staple standby for me (though I’m sure the professional would scoff), but on occasion, I either use equal amounts of AP Flour with equal amounts of Cake Flour. I have also been known to use the same formula with Self-Rising Flour when working to achieve a nice rich Mud Cake.

So the next time you’re starting to bake and happen to have a bunch of flour options, consider an experiment and see what you like. But if you do, let me know what you think!

How to Fill a Cake

20 Jul

Well, now that we’ve decided we get along, I am going to teach you how I “fill” a cake. There are a lot of techniques you can adapt to your own taste and style, but don’t make the mistake of thinking filling techniques are unimportant. Making a beautiful cake is much like building a house. The stronger your foundation, the better the result.

The first thing to do is trim the dome off of the top part of your cake. This will help establish a solid foundation as you’re decorating your marvelous creation.

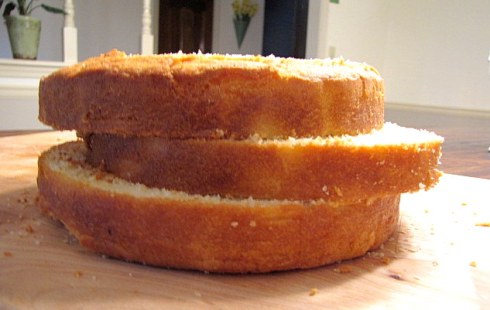
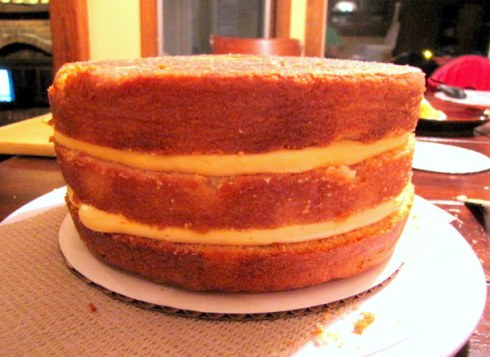
Next, torte (slice) the cake into even layers. This cake was 3″ tall, so I cut the cake into thirds. I generally try to make either 3 or 4 layers from a cake this high. Helpful Trivia: if you cut your cake into thirds when it’s 3″ high, by the time you finish filling and icing the cake, you should have a 4″ high cake.

Once you make the very difficult decision about what flavor filling you are going to make, you are ready to fill you cake with decadent goodness. If you’re worried about your cake drying out before your guests have a chance to try your creation, brush each layer with sugar syrup (equal parts sugar and water, boiled and then cooled) using a pastry brush.

My technique is this: I use a large pastry bag, and an Ateco decorating tip size 808 to do the work for me. The key is to create a “dam” just inside the edge of each layer. Doing this will keep your filling from oozing out, as well as giving you an even finish. If you ever see an unintentionally lopsided cake, you can pretty much guess that it wasn’t filled correctly.  Create the dam by holding your pastry bag at a vertical angle as you make your border around the edge of the layer. Then, squish a bunch of that yummy filling on the inside of your dam, being careful not to add too much.

You want the filling to be even with the dam, not higher. Once you smooth it out into a nice flat layer of filling with a palette knife, you’re ready to add your next layer of cake.

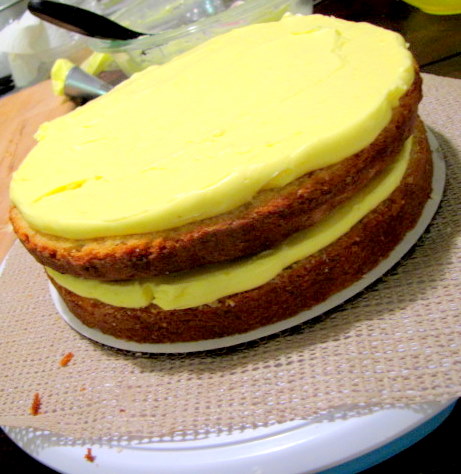
And here we have a nicely filled cake. A couple of things to keep in mind: First, if you decorate your cake upside down from how it was baked, you will give yourself a nice flat clean surface on the top of your cake. Notice how this one is pictured upside down.  Another thing you may want to do is put a small circle of icing or filling on your set-up board to keep the cake from sliding around when you’re working. It acts like a glue, and saves you a whole lot of hassle.

That’s all for now! Bake on.

The Truth in Black and Red

11 Jul

Being a self-taught cake decorator/designer is very similar to being a new mom. One day you’re riding the wave of success, and another you’re screaming into the void, “WHY DIDN’T ANYONE TELL ME THIS?!” Since I am familiar with both vocations, I hope to answer some of the void-screaming for you.

Today we talk about color paste. Specifically black and red color paste.

Now, forgive me for being limited in my brand selection. To be honest, I have only tried a couple of different brands of color paste in my day, but Wilton is all I can really speak with any accuracy about because it’s what I use. The reason I singled out these two colors is to warn you of flavor. Some people don’t mind, but since my motto is “a cake should ALWAYS taste as good as it looks”, these are things I care about.

Let’s start with red. Specifically “No-Taste Red”. If you are going to work with this color, either incorporating it into buttercream, fondant or anything else, you have to know that any other kind of red will have a distinct bitter flavor. That’s why they came up with “No-Taste”. “Christmas Red”, “Burgundy”, “Red”… if you’re about to purchase them, be warned. If used in fondant, the flavor is slightly less noticeable, but in other kinds of icing, the void-yelling is inevitable.

As far as black goes, yes, there is a bitter flavor. No, I have never found a “No-Taste Black”, but I still use it. The primary thing I want to warn you about is its staining power. All col0r paste has the potential to stain your clothing, but if you work without gloves, your hands and fingernails will have a blackish purple twinge for a while. It comes out eventually.

Yesterday I incorporated it into a batch of gumpaste I was using (knowingly staining my hands), but after an hour at the pool with my daughter, a few hand-washings, and a shower, it was mostly gone. I only warn you because I once finished a cake on the day I was to attend the party, and came in looking like I had been working in the garage on my car all day.

The other warning about black is that you need quite a bit of it compared to other colors. Side note: if you mix it with white icing of any kind, buttercream or fondant alike, it does NOT turn gray. It actually looks purple. So if you want any gray details on any cakes, don’t buy black to make that happen.

That’s all for now!

How to Bake a Cake

9 Jul

After plenty of research about this topic, I decided to throw my techniques out there for your experimentational enjoyment. (Yes, I know that “experimentational” isn’t grammatically correct). This will hopefully help you get closer to your own brilliant schemes.

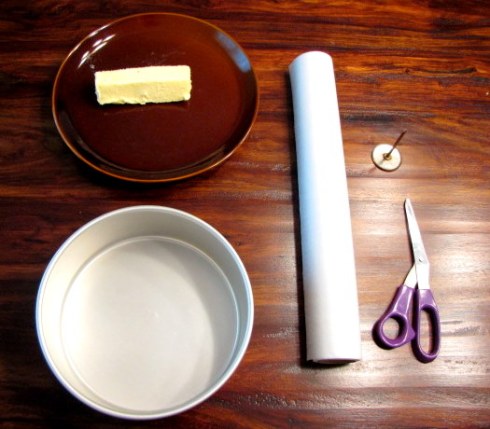
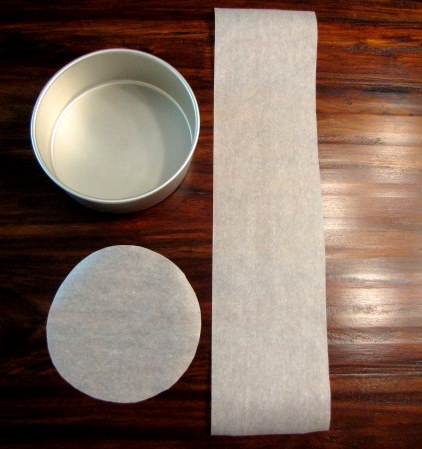
Here’s where we begin. Get yourself a cake pan, a bunch of butter, some parchment paper (or waxed paper), a rose nail if you cake pan is 8″ or larger, and finally a scissors.

I’m using parchment paper for this round of cake baking, but only because I’m doing a vanilla cake. I use parchment paper with cakes like vanilla because the moisture and “sticky-ness” level is low. Waxed paper works great for high moisture cakes like chocolate or carrot.

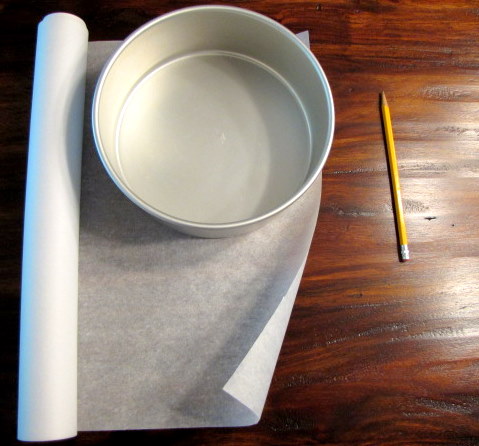
STEP ONE: grab a pencil and trace a circle in the parchment paper around the pan you are planning to line.

Next, cut a rectangular piece of parchment paper to line the side of your pan. I like to make sure the parchment will sit around 2 inches or more above the top of the pan. You can either guesstimate this, or be a math whiz and measure the circumference of the pan and cut the parchment accordingly.

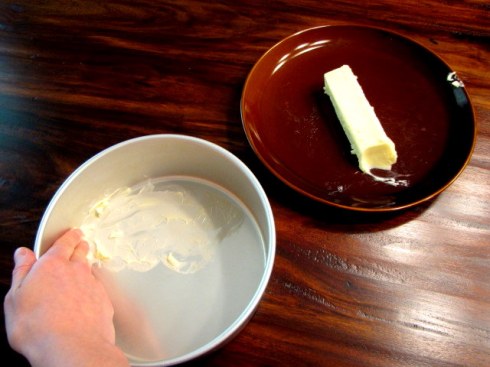
Yes, this is butter. Why don’t I use shortening? Well, firstly because I think shortening is far inferior to butter except in very unique situations. Secondly, my experience has led me to the conclusion that shortening tends to create a strangely dry crust around the edge of the cake. Now, forgive me if you disagree, but I’m quite picky when it comes down to butter versus shortening.

Anyway…. STEP TWO: smear that nasty goodness all over the pan. It doesn’t have to be a thick layer, but it does need to cover the inside of the pan.

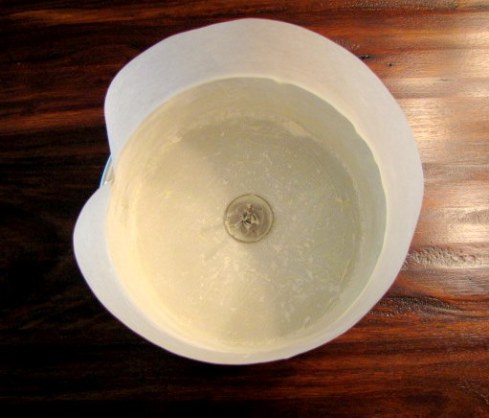
STEP THREE: line the pan with the parchment paper, and YES I’M DEMANDING MORE BUTTER

STEP FOUR: cover the top of the parchment lining with another thin layer of butter. You can dust the pan with a thin layer of flour if you like at this point. Sometimes I do, sometimes I don’t, but I did in this case again because I was making a vanilla cake. I don’t take chances with vanilla.

STEP FIVE: Because this is an 8″ round cake, I am placing a buttered rose/flower nail in the middle of the pan to help it cook evenly.

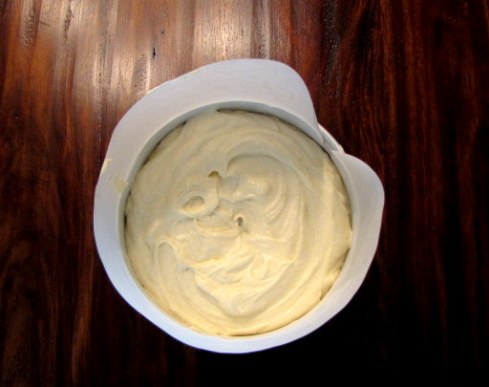
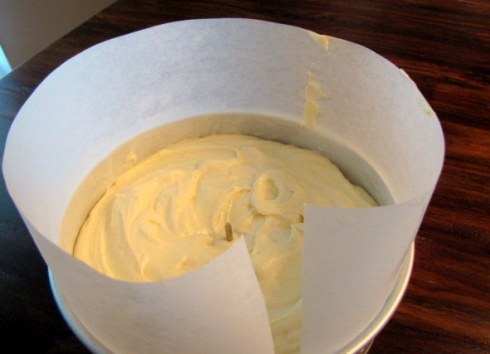
STEP SIX: Add your batter. Now, most of the bakers I’ve gleaned from say to never fill a pan with batter over half full. I don’t agree (hence the parchment paper collar around the side of the cake to protect it from spilling over). What I do is fill the pan to ALMOST full, and then be super patient and let that thing take its time baking.

STEP SEVEN: Okay, so here’s the deal. Cakes take a long time to cook if you do it this way. At least ones made from scratch do. If you’re going to attempt these steps with a boxed cake mix, I have NO idea what to tell you. Don’t ask me. If you have batter from scratch, this should work. Okay, maybe “long time” is stretching it a little. In the American culture, a “long time” is basically anything over 20 minutes. It usually takes mine over around an hour or so to bake, but keep checking it.

Here’s an important tip: a cake should not take less than 30 minutes to cook. In fact, 30 minutes should be the starting point for any cake 6″ or over.

Here’s another important tip: a cake should NEVER be baked in an oven over 350° F, unless you have to compensate for altitude… in that case, I have no idea what to tell you. I always bake at 325-350°F.

Here’s a tip that’s not vital but is helpful: I always use wooden skewers to test whether or not the cake is done baking. (The cake is done when the skewer comes out clean).

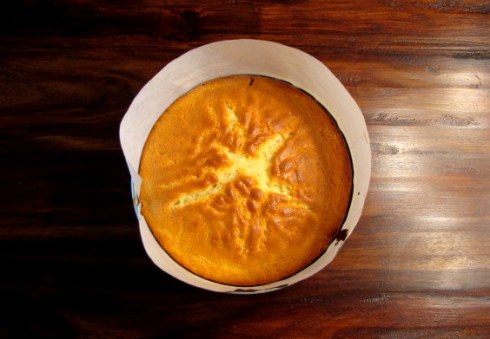
STEP EIGHT: once your cake is finished cooking, let that sucker cool. It takes a while, but be patient. Put the whole shebang on a cooling rack until the bottom of the pan feels cool. Once it’s done, turn it upside down on the rack to let it cool just a little longer.

One more helpful tip: when storing an unfrosted cake, cover it with plastic wrap, and stick it in an air-tight container. I never put my cakes in the fridge because the moisture in the fridge works on the cake, and I’m always disappointed to have a cake dry out after it warms up back to room temperature. I just throw that thing right on the counter and have never had a problem.

In the words of  Bill Nye the Science Guy, “NOW YOU KNOW!”

The Saga Begins

7 Jul

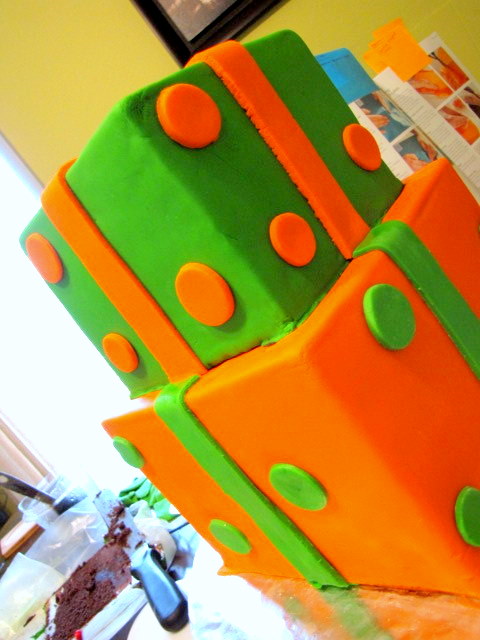
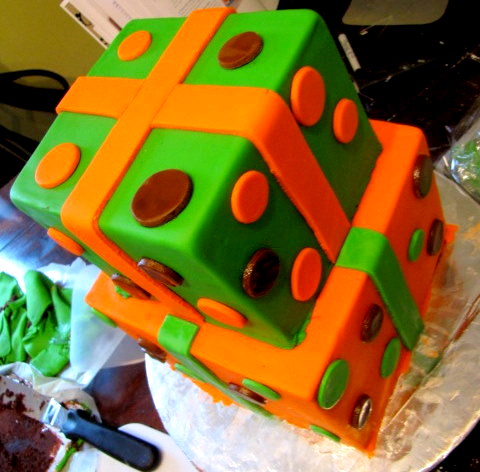
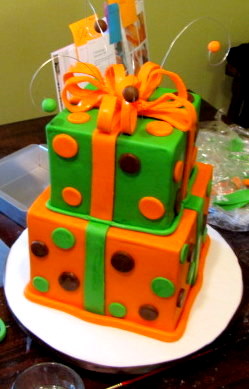
With much excitement, I received my first official cake order last November. As it turned out, it was a LOT of firsts for me. It was my first attempt at a square cake, which is a skill in and of itself to master. However, I had to make two square cakes in order to give it two tiers, which means that it was my first time ever stacking a cake. To top it off, it was my first attempt at making something I designed myself. Needless to say, I learned a lot.

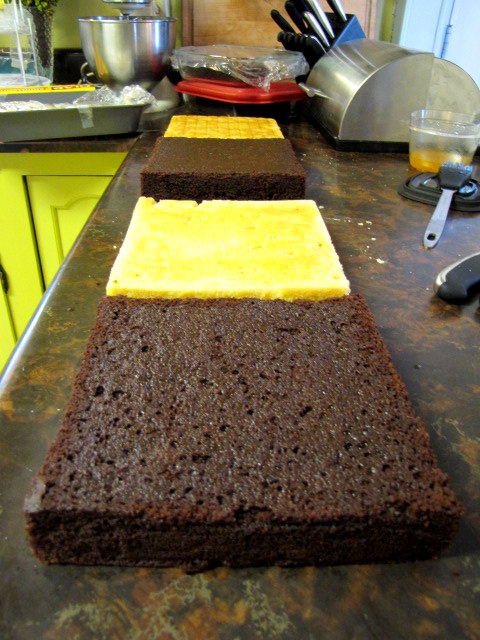
And so it all began… the customer wanted two separate cake flavors to offset the giant amount of chocolate ganache that would cover the cake, so I included alternating layers of Chocolate Mud and Yellow Vanilla Bean.

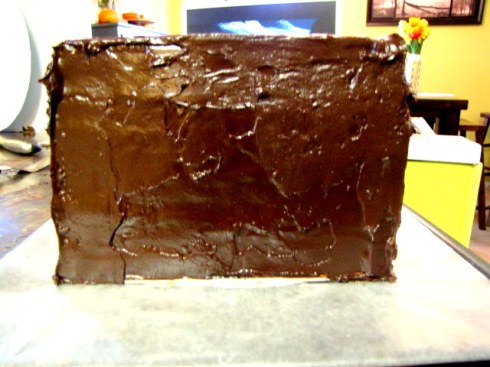
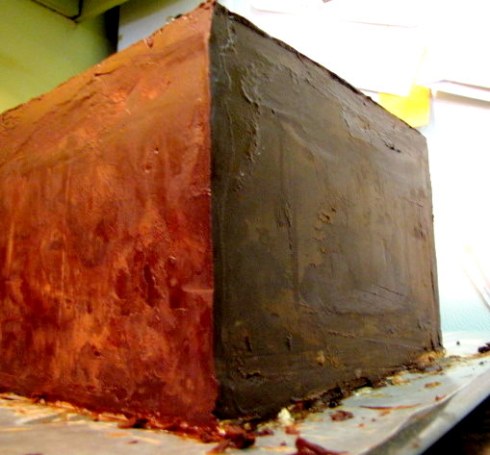
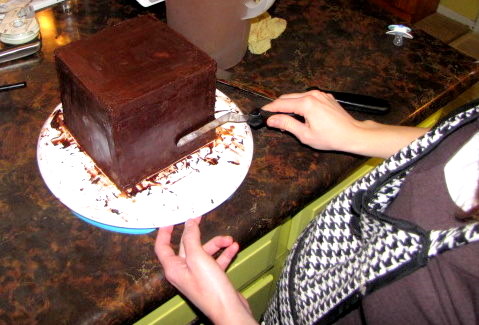
Once deliciously smothered in dark ganache, the bottom tier was ready for a few minutes in the freezer so I could quickly hot knife it.

For my first time hot knifing a square cake, I think I did pretty well. Side note: when I stick a cake in the freezer for a few minutes to get the ganache to set up, I generally place a piece of waxed paper over a flat cookie sheet or broiler pan. That way, there’s no lip on the pan to have to deal with when I take the cake off of it to transfer it to my turntable.

Oddly enough, hot knifing the smaller tier was slightly more difficult. To create perfect corners and sharp edges, I do much better on a larger surface. Don’t ask me why.

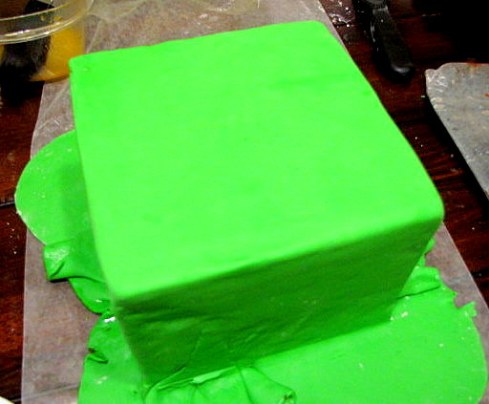
Now for the fondant! This is a picture of the top tier. November in Kansas City is generally pretty dry, but you wouldn’t believe the trouble I had rolling out this fondant! Humidity was my enemy, but I was able to patch the look of it for a smoother finished product.

I skipped a few steps in taking pictures because I was, you guessed it, pressed for time. Don’t worry, I’ve learned my lesson. In a future post, I’ll show you how I stack cakes. To my relief, stacking this cake was a breeze.

Just in case you haven’t realized this by now, when I’m nearing the end of my creation, pictures with extremely cluttered backgrounds generally mean I’m in a hurry. No apologies- just warnings.

Somehow I was able to tackle this beast. It must have weighed 30 pounds! (Something I didn’t think about until I was trying to carry it out to my car!

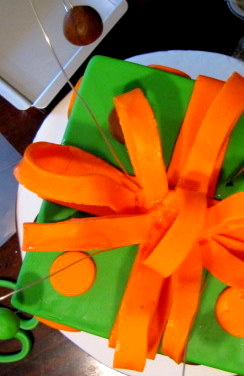
One more first: making a fondant ribbon. I’m still not a master of this technique, but that’s why we have future posts, right? Finally, I was able to deliver my very first cake order. One minor problem, other than the fact that I almost lost this thing taking a slightly sharp turn (don’t worry, it was unharmed), was that I had NO clue as to how to estimate servings. The poor kids who ordered this beast didn’t even finish the top tier between all of them. So you guessed it! We’ll be talking about servings in the future as well.

For now,  I’m off to get some much-needed play time with my daughter.

Top Picks for Getting Started

6 Jul

Every baker has their own way, but I thought I’d share with you what my favorite beginner supplies are. These are the items I use most. You can always add other specialty supplies later on when you get a feel for the process of baking and decorating.
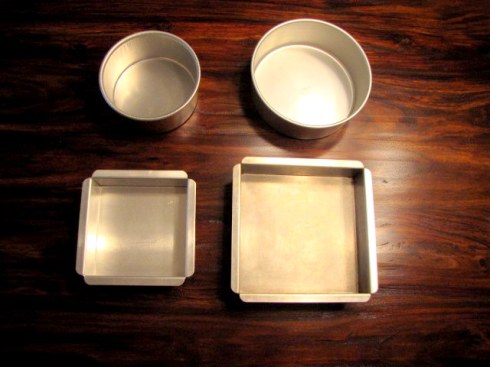
I begin with pans. I have a wide selection of sizes these days, but these four are my top picks: a 6″ and 8″ round, and a 6″ and 8″ square. I don’t recommend sinking a ton of money on lots of different pans unless it’s burning a hole in your pocket and you have tons of huge cake orders piling up before you even get started. My guess is that you’ll start with birthdays or special occasion cakes, and work your way up.  You can purchase cake pans at Michael’s, Wilton online, or even some Wal-Mart stores (I’d give you the link, but they don’t have any decorating products on their website that I could locate).

So far, my favorite cake pans are Magic Line. Though Wilton is a great brand for beginners, Magic Line is preferable to me because they are far more durable. Their square pans (pictured above) have extremely sharp edges and vertical sides. The corners of Wilton pans are more rounded, and the sides of their square pans are not perfectly vertical. Now, to be fair, I do use them. I just prefer Magic Line if I have the choice.
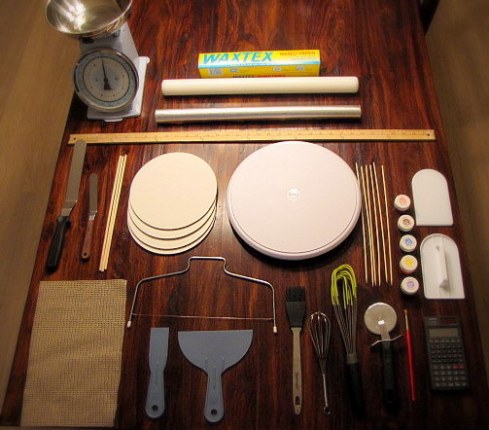
Here’s a rundown of my top favorites, reading from left to right, and from the top down.

1) A Scale; yes, you can live without it, but MAN it’s helpful!

2) Waxed Paper; parchment paper is helpful too, but I find waxed paper to be more versatile,

3) A Fondant Roller; the fact that this is a must-have is pretty self-explanatory,

4)  Foil; I have decorative foil pictured above, but standard foil is just as useful, if not more so,

5) A Yard Stick; when making a cake with fondant, you cannot live without a means of measuring, and to me, a yard stick is the easiest way to be precise,

6) Large and Small Palette Knives,

7) Dowel Rods; you need these if you plan to incorporate more than one tier to your cake,

8 ) Setup Boards in the size and shape of your cake; in addition to these boards, you will want to have thicker “Display Boards”. I often cut my own boards out of foam board.

9) A Turntable; many sizes, materials, and heights are available in turntables, but starting with a small and cheap plastic one is totally fine. (Here’s a secret: I haven’t upgraded to a professional grade one yet).

10) Wooden Skewers; this is a baking must-have. Rather than testing the insides of your cake while it’s baking with a toothpick, use these puppies. They’re easy to find, and you reduce your risk of burns since they’re significantly longer than a toothpick!

11) Color Paste; individual colors can be purchased at cake supply stores and craft stores alike, but they can also be purchased in packages.

12) Fondant Smoothers; you are going to need these just as much as a roller.

13) Non-stick Liner; I get a roll of this stuff at Wal-Mart, and place it between my turntable and cake to keep it from slipping while I’m working.

14) A Cake Leveler; I list this item because it saves time, not because it’s 100% necessary.

15) Putty Knives; I picked these up at my local hardware store for under 5 bucks. They work beautifully when icing a cake with either ganache or buttercream.

16) Pastry Brush; if you don’t have one, get one.

17) Small and Large Whisks

18) Pizza Cutter; cutting fondant is way more enjoyable with a pizza wheel

19) Small Paint Brush; once you are in the decorating phase of your creation, a small brush will be your best friend

20) A Calculator; now, before you roll your eyes and tell me you’re too “artsy for math”, cake decorating is as much a science as it is an art. Just trust me- get a calculator.

Now get shopping so we can start!