The pictures you are about to see are from my first cake. As people look through these pictures, the number one question that comes up is, “What book are you using to learn how to do this?!” Well, here’s my big secret: a huge portion of my knowledge of cakes comes from a book called Planet Cake by Paris Cutler. It’s a fantastic book for anyone just getting started. Buy it, read it, love it!
One more thing you should know about the pictures you will be seeing over the next several posts is that my former kitchen was horrible for getting good shots. With almost no natural lighting to speak of, you’ll have to excuse the darkness of many of the pictures. I make no apologies for the mess. Baking is messy, and so is decorating. Thankfully, I have a new home with a much brighter kitchen, and in the next year it will be remodeled and even better.
 Chocolate Mud Cake was on the menu for this birthday cake. The birthday girl informed me that all she wanted was chocolate, so I topped it with dark chocolate ganache, but we’ll talk about that in a minute. Rule number one: get good pans. Rule number two: if a cake is 8″ or more, use a “flower nail” which can easily be purchased at a local craft or baking supply store and insert it into the center of the batter. Your cake cooks evenly and doesn’t end up with a huge dome once it’s finished baking.
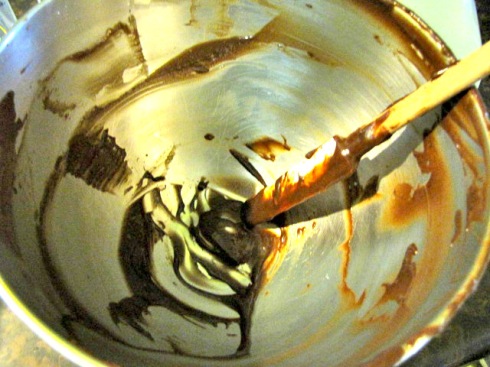 You better believe I licked this bowl clean. And to all of those labels that say “Do NOT consume uncooked batter”, I say “Put a cork in it! We’ve all been doing it for years.”
 Rule number three: I live by the “butter that pan like crazy” rule to keep the cake from sticking. I butter the pan itself, and then cut out waxed paper to line the bottom of it and place a collar of waxed paper around the side of the pan. And yes, I butter the waxed paper after I do that. It works like a charm. Rule number four: when baking any cake, never bake the cake higher than 350° F (unless you live in high altitude… if you do, I have no idea what to tell you because I’ve lived on the great plains my entire life). This particular cake cooks best at 325°F.
 Now, isn’t that just gorgeous! Note the even top of the cake. The cake pan I used for this project was a 3″ deep aluminum pan with straight vertical sides. Rule number five: leave that cake alone until it’s completely cooled.
 While our cake is cooling, let’s talk chocolate. Ganache is by far one of my favorite ways to ice a cake. It locks in the moisture of the cake, and adds a decadent touch that tends to surprise your guests. Most people expect to sink their teeth into a slice of cake that’s mostly dry, spongy, and covered in crystalline buttercream. Let me just say here, that I cannot stand American buttercream. I find the stuff revolting. Forgive me, but it would be better titled “Criscocream”, and that to me is unacceptable.
Ganache, however, is two ingredients. Heavy cream, and couverture chocolate, which is just a fancy way of saying “chocolate that does a good job at covering a cake”. Chocolate of this variety should be no less than 53% cocoa, and no more than 63% cocoa. Now, you can spend a fortune on posh chocolate, but I use good old Baker’s Chocolate of the semi-sweet variety. I believe it falls around 54% cocoa, and it’s easy to track down.
 When you chop the chocolate up into small pieces and mix hot (not scalded) heavy cream with the pieces, it melts in seconds, creating this gloriously smooth ganache. I wait until the mixture has cooled to the consistency of peanut butter, just like the Planet Cake book says, but you can stick it in the fridge and melt it in the microwave in short bursts of about 2o seconds. The consistency is easy to restore.
 Rule number six: it takes somewhere around three days to complete a cake made with fondant, so I allow plenty of time to make mine. Don’t try to do this the night before a party. You will be MISERABLE! The best part about all of this is taking your time and letting your creativity take shape. “How do you keep your cake moist?” you ask? Well, here’s rule number seven: bake it, and then cover that sucker with tons of plastic wrap and stick it in an air-tight container. Should you put it in the fridge? I don’t. Some bakers do, but for me, I find my cake stays moist longer if I leave it at room temp on the counter than in the fridge where moisture tends to take it’s toll.
Rule number eight is this: come up with a “syrup” recipe that works for you. I’m not talking about anything you would dream of putting on pancakes. “Syrup” in the baking world is a term for a mixture of water and sugar. Do a little research on the subject, and I know you’ll find more information than you ever wanted. The point is, when you brush each layer of your cake with syrup just before you ice your cake, it will stay delectably moist and you won’t have to worry about it drying out over the span of the next few days.
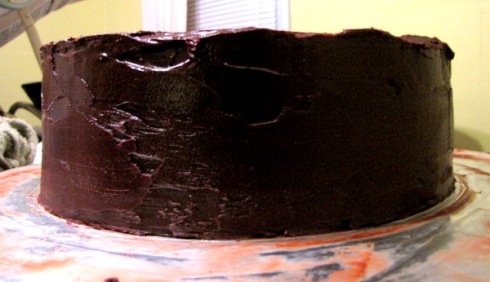 Once you have torted (cut your cake into 2-4 layers), brushed them with syrup, and iced them with ganache, you can then move onto process of “hot knifing”. The process is pretty self-explanatory, but basically you stick a large palette knife or serrated knife in boiling hot water, and then, for lack of a better term “whittle” the cake down to create the sharpest edges possible. Obviously, the picture above was my first attempt. It takes practice, okay!
 Now for my favorite part: decorating. Covering a cake with fondant is probably on my top 10 list of favorite activities. Rule number nine: make your own fondant at least once! In a future post, I will explore all different kinds of fondant and give you my opinions on the best fondant on the earth, but for now I will tell you that I have NEVER tasted a store-bought fondant I liked. In fact, when people try my cakes they are often shocked that the fondant tasted so good, rather than the bitter flavor they have come to expect from fondant. I always make mine from scratch, and it’s never failed me.
 Because I miscalculated the amount I needed, the fondant pictured above was marshmallow fondant (aka: MMF), which is simply a mixture of marshmallows, water, and confectioner’s sugar. MMF is good-tasting, but I find it unreliable, so I don’t typically use it unless a crisis hits like it did when I was making this cake. I only used it for part of the cake, but as you can see, the edges of it were pretty brittle when I was smoothing it out.
 Despite the patience it requires, you can see that MMF can look very smooth once you’ve finished smoothing it, regardless of the fact that it lack the elasticity of real fondant. Rule number ten: if you’ve covered your cake in ganache, brush more sugar syrup on the cake before covering it with fondant, or the stuff will not stick to your cake. If you don’t have sugar syrup, a spray bottle with clean water can work just as well (just don’t douse your cake- you only want a light spritz). In fact, I do that a lot to save time.
 I will save you many of the details, since you can see the real deal in the Planet Cake book, but as you can see, the hat box/gift cake was taking shape. The blue and white stripes were made from “real” fondant, not MMF.
 I topped it with a very stressful bow. Stressful because I was running out of time, which brings me back to reminding you of rule number six: ALLOW PLENTY OF TIME TO COMPLETE YOUR CREATION! It all came together just before I threw the party, but PHEW! That was no walk in the park.
 And there she blows! Now, I have improved in a lot of different areas, so if you’re looking at this and saying to yourself, “Shoot, I can do that!” then my mission is accomplished. Seriously. You can. I was just proud to be done with the thing with 15 minutes to spare before the party started!
 I didn’t know what to expect, but tears came to my eyes when I bit into this monster of a cake. In fact, it was the best cake I had ever tasted! Rule number eleven: NEVER store a cake covered with fondant in the fridge. The moisture will cause the fondant to sweat and melt. Fondant is basically a million different kinds of sugar all combined together, and what happens to sugar when it meets water? That’s right: MELTAGE! You can safely store a cake of this kind at room temp for a few days as long as it’s properly covered with plastic wrap or in an air-tight container, but you can also safely store it in the freezer for even longer. Don’t ask me how long. Cake doesn’t really stick around in my house long enough to find out!
Tags: Aluminum Cake Pans, Baker's Chocolate, Cake Baking, Chocolate Mud Cake, Fondant, Ganache, Ganache vs. Buttercream, Marshmallow Fondant, Paris Cutler, Planet Cake, Storing Cake
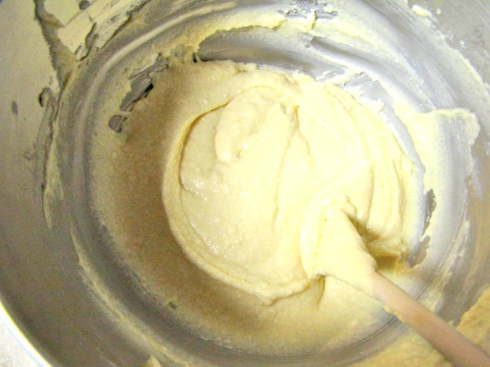 This was a vanilla cupcake recipe. One issue has baffled me throughout my exploration of cake making, and I have yet to resolve it; I cannot for the life of me find a vanilla cake recipe that I like. Now, hang on a minute, because all of you vanilla lovers out there tend to defend it to the death. I typically use a yellow vanilla bean recipe that is a massive crowd-pleaser. The standard white vanilla recipe, however, never sits well with me. Call it personal preference, call it stubbornness, call it poor taste, but I hate white cake. The batter tastes delicious (yes, we have already established that I’m of the dangerous category of person who enjoys a spoonful of raw batter), but the baked product is often dry and hard.
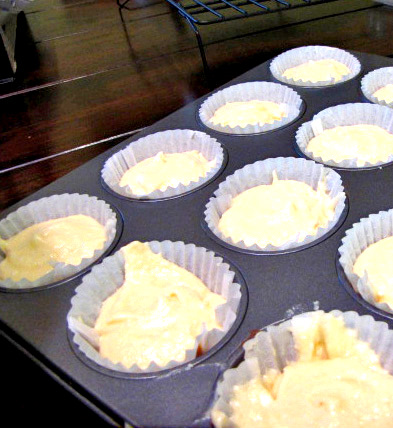 I had high hopes for this batch, and everyone at the party enjoyed them, but once cooked, they left me wishing I had chocolate. (Take that with a grain of salt… I do prefer chocolate over vanilla 9 times out of 10).
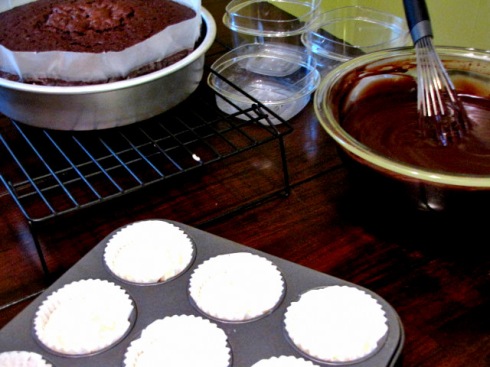 Here they are, ready to go in the oven next to the dark ganache, and my first cooling chocolate cake. No, I didn’t do something wrong and screw up the batch. Side note: every white vanilla cake recipe I’ve ever eaten or baked has been sub-par.
 As you can see, the cupcakes turned out beautiful. A very small dome on the top made them easy to decorate. When you are making cupcakes, though, remember to allow them to cool completely and then cover them right away if you do not intend to decorate them until later. I heard a baker once say, “Air is cake’s natural enemy.” It’s true especially for cupcakes because of their smaller size.
 Before ganaching my cupcakes, I trimmed off the slight dome so I had a flatter surface to work on, brushed them with some sugar syrup, and then went to town. Hot knifing goes for this as well.
 This was me racing against the clock to once again finish my project before I ran out of time. I had a blast, but as you can see, I donned the pajamas as well as an apron made for me by my aunt when I was about 10 years old.
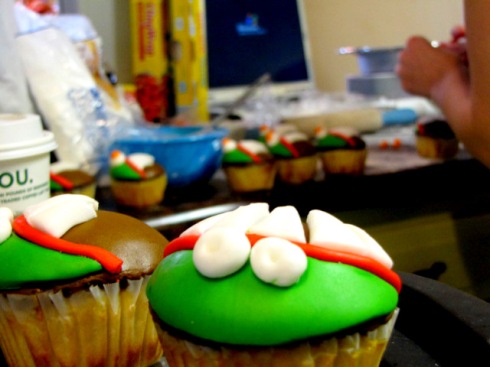 Once the hot knifing was done, a short brush of more syrup paved the way for the application of the fondant. I learned that cupcakes are FAR more time consuming than cakes… or at least they can be. To simplify the process, I created somewhat of a one-woman assembly line. The lesson of the day: remember to keep those suckers covered! Fondant can dry out quickly, especially on a dry day.
 …And voila! Now, if you happen to purchase a copy of Planet Cake, you’ll notice that I used brown fondant instead of black for the mouth. This was only because I didn’t discover until the day I had to have them finished that I did not yet own black color paste, providing me with yet another lesson; MAKE SURE YOU HAVE EVERYTHING YOU NEED BEFORE YOU BEGIN. Sometimes I get so excited to start that I skip a few steps.
 Another thing you will notice upon seeing these cupcakes in the Planet Cake book is that I used different sized triangles to make the teeth. I wanted to add a little personal touch and character to each of the cupcakes, rather than making them 100% uniform.


